24 Sandy Lane, Lower Darwen, Darwen, BB3 0PU, United Kingdom
01254 665 160
How to tile a kitchen wall.
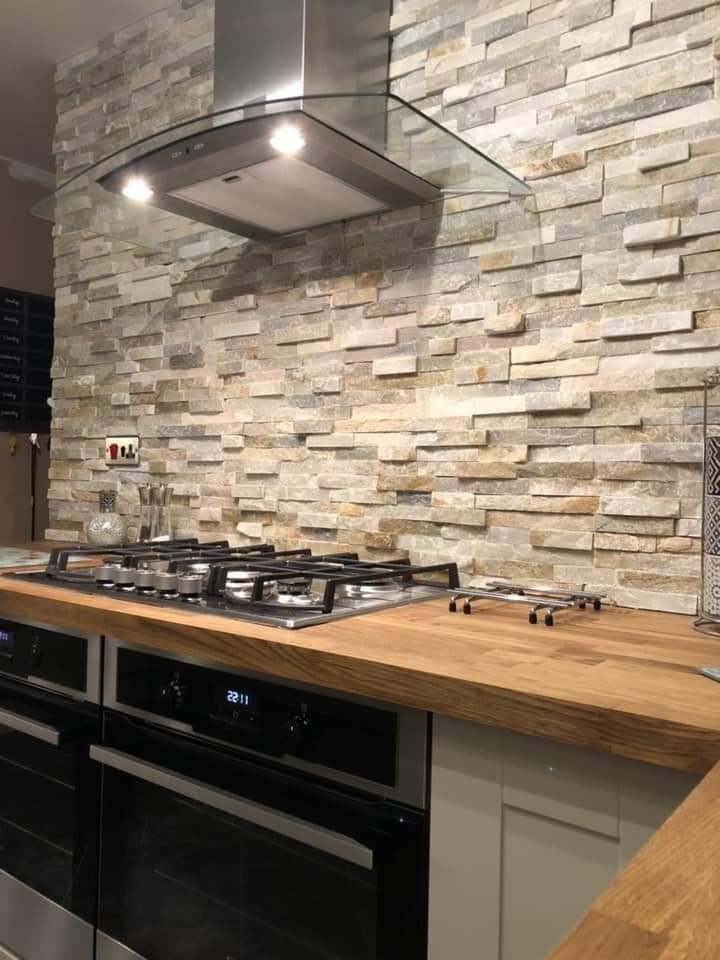
Tiles are often one of the most cost effective ideas for a kitchen splashback wall – and by getting your hands dirty with a bit of DIY, you can make a great saving when it comes to new interior DIY work. Below is a list of what we have complied a step-by-step guide to tiling a kitchen wall.
-Make sure the wall surface is clean, dry and smooth – give any lumps or marks a rough sand if they’re large enough to make the surface uneven, If you have a painted wall this would need scraping off as emulsion will stop the tile adhesives making a key to the wall.
- Make sure you prime the wall with Acrylic Primer and NOT PVA as this crystalizes with the tile adhesive and does not make a key.
-Mix your tile adhesive (power) or ready mix adhesive is great for ceramic wall tiles and apply it to the bottom of the wall using a notch trowel – you only need to apply enough to stick on your first horizontal row of tiles. Make sure you get a generous and even layer of tile adhesive on the wall, using the notched trowel to create vertical or horizontal lines on the wall.
Once you’re happy that you’ve got an even application of adhesive on the wall, it’s time to apply your first row of tiles. Firmly press down on the tile using a circler motion allowing the air to escape from behind the tile to make a great bond.
Starting from the centre of the wall gives your tiles equal cuts at either sides to make the tiles look symmetrical. Install the next tile in the row, inserting tile spacers between each tile to ensure that the gaps between them are even and uniform.
When you reach the end of your row, you may find that there’s not enough space left for a full tile. Measure how much tile you need to cut away and mark the tile with a pencil. Use a tile cutter to score a line along the tile and apply light pressure to break the tile along the score. Don’t forget to factor in the size of the tile spacer when taking your measurements.
Before starting on the next row of tiles, check they’re horizontal with a spirit level. Once you’re happy, just repeat the process, inserting spacers between all four sides of each tile to ensure they’re in line.
Wipe off any excess adhesive before it dries and then apply your grout of choice. You might want to opt for an anti-mould or grey grout to avoid dirty marks. Apply the grout generously to the gaps in between each tile, using a plastic grout trowel or your fingers to ensure an even and smooth finish. Before the grout has time to dry, quickly follow up with a damp cloth to remove any smears from the surface of the tiles.
Cheap Large Format 1200x600 Porcelain Tiles
Top Range Tiles Blackburn
Tiles Darwen Blackburn Accrington Tops Tiles
Tile Shop Euxton Tiles
Tile Shop Blackburn Darwen
Affordable Bathroom Suites in Darwen Blackburn: Your Dream Bathroom Awaits!
Enhance Your Darwen Home with the Power of Colour and Pattern from Darwen Tile Sales
DARWEN WALL & FLOOR TILES SHOWROOM
levate Your Bathroom Aesthetics with Premium Tiles in Darwen, Blackburn, and Accrington
Transforming Spaces with Precision your go-to Tilers Darwen Blackburn and surrounding areas.